
You have spread gravel on a driveway, and after a few days of rain, ruts are already appearing. The problem does not come from the gravel itself, but from how it was laid. Compacting gravel in an outdoor project relies on three interrelated parameters: the choice of material, soil preparation, and the compaction method. Neglecting any one of these elements compromises the integrity of the whole.
Crushed gravel or rolled gravel: compaction starts at purchase
Before discussing tools or techniques, ask yourself a simple question: what type of gravel have you chosen? Rolled gravel, with smooth edges, behaves like marbles. The grains slide over each other and never really interlock. The result: even after several passes with a vibrating plate, the surface remains unstable.
Further reading : Discover the Oh Brico site: tips and advice to succeed in your DIY projects
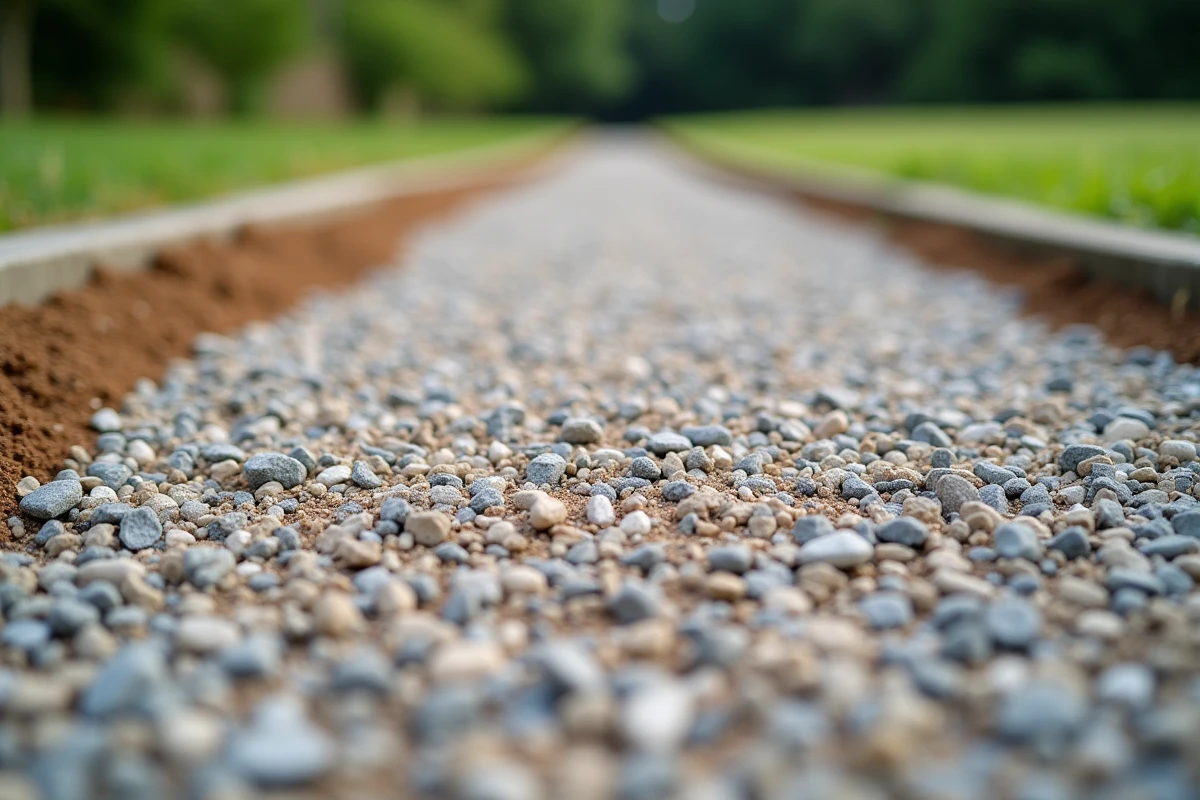
A crushed gravel with sharp edges interlocks naturally under pressure. Its angular faces create a mechanical locking effect between the grains. This phenomenon provides a dense and durable foundation for a driveway or parking lot. Granulometry also matters: a mix of different sizes fills voids better than a single size. Prioritize crushed gravel rather than decorative graded gravel if durability is your priority.
To better understand how to compact gravel effectively, you must first grasp this principle: the shape of the grain does half the work of compaction.
Recommended read : Plan Your Next Road Trip: Routes and Tips for a Successful Car Journey in France
Soil preparation before compaction: what distinguishes a stable result from a mediocre one
Compacting gravel on poorly prepared soil is like laying tiles on sand. Excavation is the first step. It involves removing the topsoil to reach a stable base. For a pedestrian walkway, a moderate depth is sufficient. For a vehicular path, you need to go deeper to absorb the weight of vehicles.
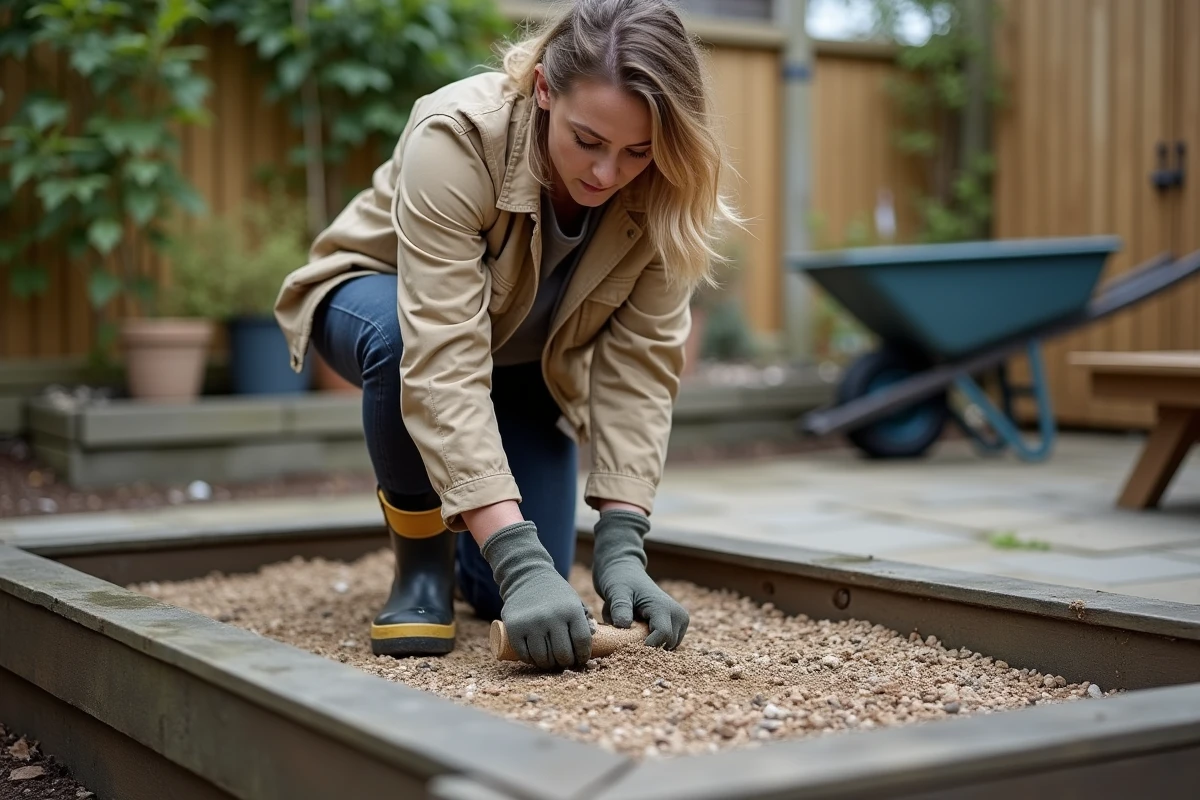
Leveling and geotextile
Once excavated, the base must be leveled with a rake and then compacted for the first time. It is on this base that you lay a geotextile fabric. This fabric serves two functions: it prevents soil from rising into the gravel and limits weed growth without blocking drainage.
Lay the rolls with sufficient overlap to avoid gaps. Poorly laid geotextile will eventually tear under mechanical stress, causing the gravel to migrate to the soil below.
Borders: the often-forgotten confinement
You may have noticed that the gravel “escapes” to the sides after a few weeks. Without solid borders, the compaction does not hold over time. Concrete, galvanized steel, or treated wood borders serve as permanent formwork. Lateral confinement is as crucial as vertical compaction for the durability of a gravel surface.
Vibrating plate, manual tamper, or roller: which compaction method to choose
The choice of tool depends on the surface to be treated and the thickness of the gravel. Here are the three main options:
- The vibrating plate is suitable for medium to large surfaces. It transmits vibrations that rearrange the grains and expel air pockets. Work in successive layers rather than in one thick pass.
- The manual tamper (or hand tamper) works well for small areas, finishing touches, or hard-to-reach spaces. It requires more physical effort but offers precise control.
- The weighted lawn roller provides an acceptable result for thin layers of decorative gravel, but its pressure remains insufficient for a vehicular driveway.
Regardless of the tool, one rule prevails: compact in thin layers rather than in one thick layer. Each layer should be moistened and then compacted before adding the next. This successive layering method eliminates internal voids that surface-only compaction cannot reach.
Moistening the gravel: the simple action that changes the result
Why wet the gravel before compacting it? Water acts as a lubricant between the grains. It allows fine particles to slip into the voids and facilitates their rearrangement under the pressure of the vibrating plate or tamper.
Lightly spray each layer with a fine mist, without soaking. A waterlogged soil becomes unstable, and excess creates mud. The goal is to achieve gravel that is moist on the surface but not saturated below. On a job site in the middle of summer, spray several times rather than one large amount.
Stabilization cells: when compaction alone is no longer enough
For driveways regularly used by light vehicles, traditional compaction shows its limits after a few seasons. Stabilization cells (sometimes called gravel grids) are honeycombed plastic panels laid on the geotextile before filling with gravel.
Their principle is simple: each cell confines a small amount of gravel and prevents lateral migration. The result is a surface that remains homogeneous even under frequent traffic. These cells are recommended by the Royal Horticultural Society for walkways accessible to pedestrians and light vehicles, as they limit gravel migration much better than simple compaction.
They do not replace soil preparation or compaction, but they complement the system where mere mechanical pressure eventually gives way to repeated stresses.
Compacting gravel is not inherently complex. The real trap is addressing the problem with just the tool without having prepared the ground or chosen the right material. Crushed gravel, laid on excavated and leveled soil, confined by borders, moistened, and then compacted in thin layers: this is what makes the difference between a driveway that lasts and one that needs to be redone every year.